
IT'S OUR MONKEYS 1ST BIRTHDAY!! Our daughter turned 1 and I can't believe it has been that long since she graced us with her presence. It feels like it was just yesterday I was at the hospital giving birth to her. It goes by so quickly! Enough reminiscing.... IT'S PARTY TIME!! After hours on Pinterest and days trying to convince my husband, I thought I had finally hit the jackpot with Sock Monkeys. Little did I know, there wasn't much DIY or free Sock Monkey things out there (we are picky Sock Monkey people). I found tons of cute ideas but I didn't want to spend an arm and a leg on decorations or invitations. So I want to share our party and some how tos just in case you are looking for a DIY Sock Monkey party too. There are crochet, sewing and paper elements to this DIY :)
My aunt has a Cricut (best invention EVER!!) and the B for Boy cartridge has a Sock Monkey on it. It was the perfect little monkey for everything! She made banners, door hangers, and so much more.
Let's start with the invitations. Every party has to have a cute invite! I actually made the invitations on the computer in Powerpoint. My husband had to help me some with the layout but otherwise they were fairly simple. I just chose a slide that mostly resembled what I was looking for in an invitation and typed in all the aspects needed for an invite into the text box (who, what, where, when, RSVP). For a decorative theme element my aunt made small monkeys to attach to the invites and I also attached a picture of our daughter to the invite for friends and family to keep. Here is what they looked like. (The white spots are where we had the address and phone number)

The pictures on the invitation are our Monkey in her sock monkey hat I crocheted for her. I used Repeat Crafter Me's Sock Monkey Hat Pattern. It came out perfectly adorable and the was a perfect addition to the invitation.


Now on to the decorations. My aunt is completely AWESOME!! She handled all the decorations for me besides pictures and crochet things. She made an amazing large banner for us and also a small banner for her highchair. As a surprise she made a door hanger which we were able to hang outside for everyone to see when they walked up to the house. She is so crafty and such a great aunt!! I couldn't have asked for anything more perfect for our Monkeys party!


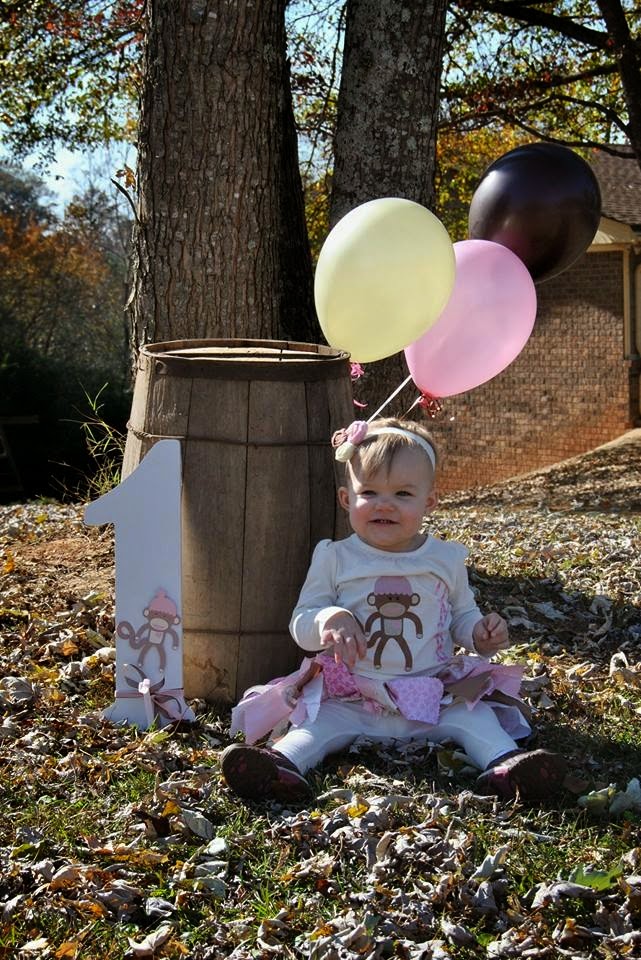
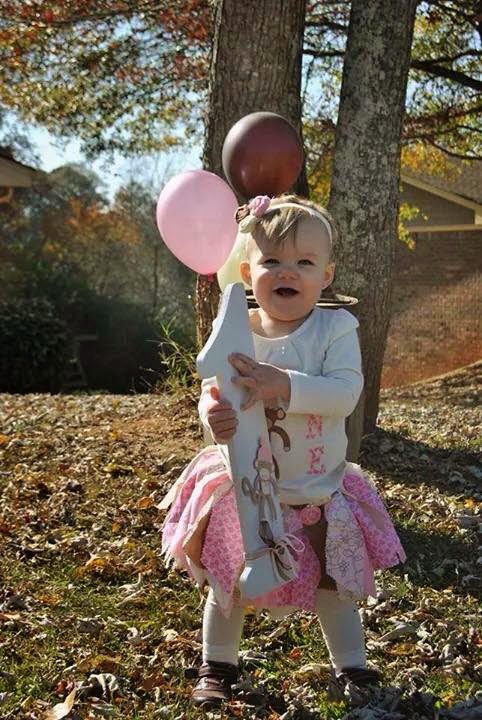
This was our decorative banners. They came out perfect!! Just as the highchair banner they had monkeys on each end and also tied together with pink and brown ribbon. And the wooden 1 was adorably cute with the added monkey and ribbon. It made a great photo prop as well!

This was hung outside on the wreath hanger so everyone could see. It was a great idea!
As if that wasn't enough, her outfit was perfect as well. She had a custom shirt, fabric scrap skirt, and a rosette hair bow... All handmade!!

For the shirt I had found a tutorial on cutting fabric with a Cricut and sent it to my aunt to see if she thought we could do it. She was beyond excited to try something new and took on the task of making the shirt. She pulled it off perfectly! I couldn't have asked for anything cuter! Here is the tutorial we used to make appliques using a Cricut.
For the skirt I used this tutorial found here. It did not take as much fabric as I thought it would. I used fat quarters I picked up at JoAnn Fabric Store in various colors that matched the party. It came out much better than I ever could have imagined!
The headband took some patience and plenty of hot glue. I used a tutorial I found on Pinterest to make the rosettes and then I glued them together and glued felt on the bottom just so the clip I attached would have a better surface to attach too. Here is the tutorial I used. I suggest watching the video she has in the blog post. It was much more clear to me than the pictures.
I can't forget the cake!! CAKE!! CAKE!! CAKE!!

The cake was made by a family friend who specializes in cakes for all events. She did a fantastic job and it tasted great, as you can see!!


THE CUTEST SOCK MONKEY BIRTHDAY GIRL EVER!!! I think we pulled off a great 1st birthday party and can't wait to see what this next year brings!!

Preserve me, O God, for in You I put my trust. -Psalms 16:1
